ソースのまとめ
すべてのソースをまとめて掲載しておきます。コピー&ペーストして使ってみる際などにご活用下さい。
<table class="red">
<thead>
   <tr>
      <th colspan="2">テーブルの見出し</th>
   </tr>
</thead>
<tbody>
   <tr>
      <th>項目名1</th>
      <td>項目値を記述するセル1</td>
   </tr>
   <tr>
      <th>項目名2</th>
      <td>項目値を記述するセル2</td>
   </tr>
   <tr>
      <th>項目名3</th>
      <td>項目値を記述するセル3</td>
   </tr>
</tbody>
</table>
/* ▼テーブル全体の装飾▼ */
table.red {
   border-collapse: collapse; /* 枠線を重ねる */
   border: 1px solid #e0aaaa; /* 外枠の装飾 */
}
/* ▼テーブル内側(セル)の装飾▼ */
table.red th,
table.red td {
   padding: 0.3em;            /* セル内側の余白量 */
   border: 1px solid #e0aaaa; /* 内枠の装飾 */
}
/* ▼テーブルの見出し部分の装飾▼ */
table.red thead th {
   background-image: url("./trback1.jpg"); /* 背景画像 */
   background-position: bottom left; /* 背景画像の配置 */
   color: #cc0000;            /* 文字色 */
   background-color: #ffeeee; /* (念のための背景色) */
}
/* ▼各行の見出し部分の装飾▼ */
table.red tbody th {
   background-color: #ffeeee; /* 背景色 */
   color: maroon;             /* 文字色 */
}
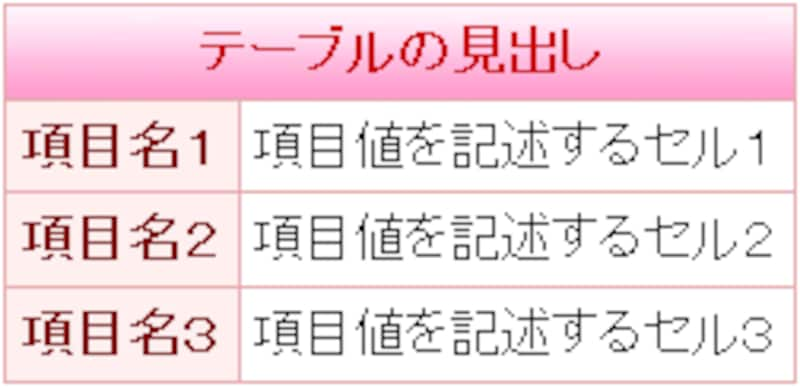
上記のソースを表示させると、以下のように見えます。
 |
おわりに
今回は、グラデーション背景画像を使って表の見出し部分を立体的に見せる装飾をご紹介いたしました。 ただスタイルシートで背景画像を表示させるだけの簡単な方法です。 ぜひ使ってみて下さい。
なお、記事中でサンプルに使用したグラデーション画像(下記)は、必要であればご自由にコピーしてご活用下さい。
![]() ・
・ ![]()
![]() ・
・ ![]()
![]() ・
・ ![]()
![]() ・
・ ![]()
![]() ・
・ ![]()
![]() ・
・ ![]()