アラートウインドウのボタン操作
では実際にOnClickListenerを組み込んで、アラートウインドウのボタンをクリックしたら必要な処理を実行させてみましょう。
package jp.allabout.android;

import jp.allabout.android.R;
import android.app.*;
import android.content.DialogInterface;
import android.os.Bundle;
import android.view.View;
import android.view.View.OnClickListener;
import android.widget.*;

public class MyAndy extends Activity {
  private Activity me;
  TextView text;

  @Override
  public void onCreate(Bundle icicle) {
    super.onCreate(icicle);
    setContentView(R.layout.main);
    this.me = this;
    // コンポーネントの設定
    Button btn = (Button) this.findViewById(R.id.button);
    text = (TextView)this.findViewById(R.id.text);

    // イベント組み込み
    btn.setOnClickListener(new BtnAdapter());
  }

  // イベントクラス
  class BtnAdapter implements OnClickListener {
    @Override
    public void onClick(View v) {
      AlertDialog.show(me, "Alert", "こんにちは!", "ok",
          new OkAdapter(), false, null);
    }
  }

  class OkAdapter implements
      android.content.DialogInterface.OnClickListener {

    @Override
    public void onClick(DialogInterface arg0, int arg1) {
      text.setText("OKしましたね!");
    }

  }
}
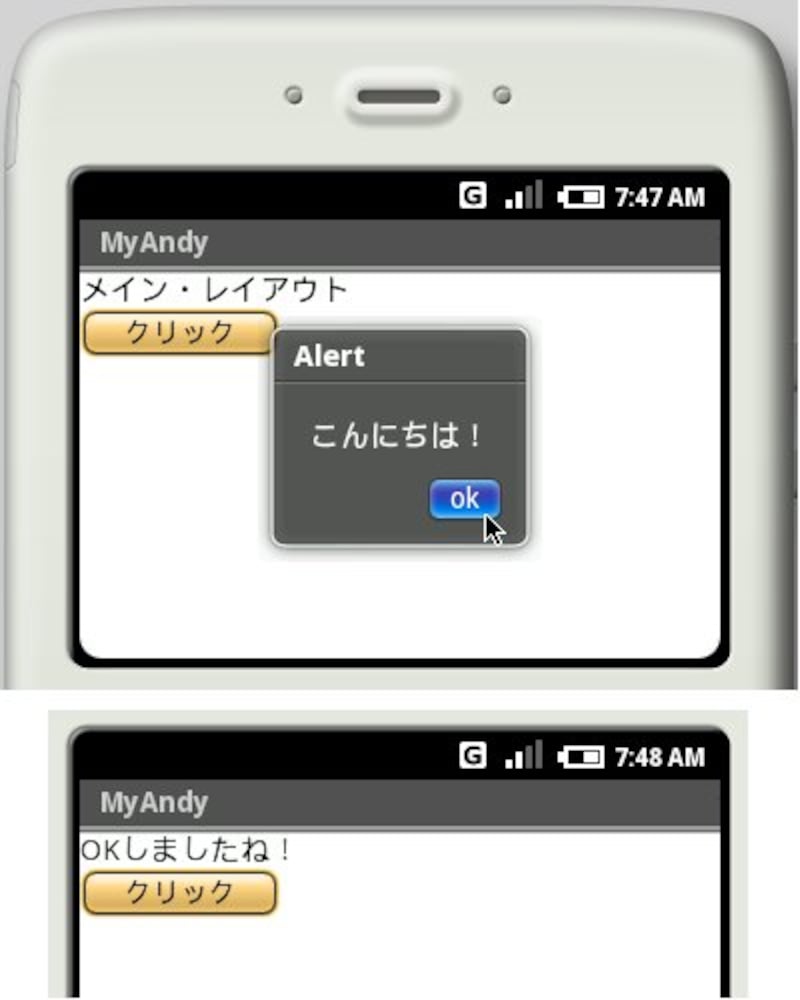 |
| アラートのボタンをクリックすると、「OKしましたね!」と表示される。 |
これで、アラートの「ok」ボタンをクリックすると、TextViewにテキストが表示される、という処理ができました。ここでは、OkAdapterというクラスを定義し、ここにクリック時の処理を用意してあります。
では、このイベントリスナーはどこでアラートに設定されているのか。AlertDialog.showを呼び出している部分を見てください。引数が増えているのがわかりますね。
AlertDialog.show([Context],タイトル,メッセージ,ボタン名,
    ボタンクリック時のリスナー,キャンセル,キャンセル時のリスナー);

[Context]――ベースとなるContext(Activity)
タイトル――タイトルのテキスト
メッセージ――表示するメッセージ
ボタン名――ボタンに表示されるテキスト
ボタンクリック時のリスナー――ボタンをクリックしたときのOnClickListener
キャンセル――キャンセル可能かどうかを示すboolean値
キャンセル時のリスナー――キャンセル時のOnCancelListener
これで、ボタンをクリックしたときのイベントリスナーを設定してアラートを表示させることができるようになります。なお、ここではキャンセル時のイベント処理としてOnCancelListenerというのも登場していますね。これもOnClickListerと同じように、アラート専用に用意されているクラスです。


![[MIDlet] ソースコードの基本を理解する](https://imgcp.aacdn.jp/img-a/156/auto/aa/gm/article/8/0/7/3/6/topimg.jpg)